Hiking is truly a beautiful experience that will really make you appreciate the fact that you’re alive and breathing in this wonderful world, but only if you’re well prepared for it. I’ve been hiking for well over fifteen years now, and I’ve seen my share of accidents and mishaps, almost always through the fault and ignorance of the hikers themselves. It’s not the surprise bear attack that gets you in the wild, it’s overestimating your abilities and underestimating your needs when you’re in the wilderness.
(Side note: Bear attacks are actually quite rare and easy to avoid if you know what you’re doing. For more info on avoiding and surviving bear attacks, or just hiking in bear country, check out this bear safety guide by Survivalmag.)
Today, I want to make sure that doesn’t happen to you by talking about some of the essential items you should always bring with you when you go hiking.

A lot of people tend to forget this one, and it’s primarily because they have no idea how dark it can actually get in the forest. You see, in an urban environment, there’s always some kind of illumination – a distant street light, a TV set shining through a window, and so on. When you’re out in the woods, it’s a different story altogether, because unless there’s a full moon out, your only source of illumination will be your fire and the stars themselves. Always make sure that you have a flashlight with fresh batteries in case you need to find your way at night or things can get really complicated, really fast.
The same goes for heat. What many people don’t realize is that even during a hot summer’s day, the temperature can often drop an additional 10 to 15 degrees compared to an urban environment. This is because when you’re back home, you’re surrounded by concrete all around, and concrete is an excellent thermal absorbent. This means that it’s great at absorbing heatwaves and radiating them back at you at night, keeping you warm and letting you sleep without the covers. There’s no concrete in the woods, however, so don’t even think that you should attempt to make it through the night without starting a fire. Bring some waterproof matches, some old newspapers, and anything else you need to be able to light a campfire, and you should be fine.

One of the worst things you can do to yourself when hiking is not bringing enough water. Hiking is really good exercise, which means that it will dehydrate you faster than you might think, and you’ll need to replenish that water in order to keep going. This goes double if it’s actually hot outside, but you shouldn’t be without water even during winter. Apart from bringing all the water you need, it’s also a good idea to get your hands on a good water filter, in the case of an emergency, so you can purify your water on the go.
It’s a rule of thumb to pack more food than you need when you’re out hiking. However, you also need to make sure that you do not pack anything that spoils easily because no matter how much you bring it will be for nothing if it all goes bad the first day. Go for food with a long shelf life, like nuts, canned food and stuff like that.
Like I said, your number one enemy in the wild isn’t that big, evil lurking black bear – it’s getting lost and having no idea how to find your way back. Make sure your phone is charged so you can use its GPS, but also bring a good compass and map that you can use to navigate in case your phone dies. It’s very easy to get lost in an unfamiliar environment if you aren’t careful, so this is something you should definitely pay attention to.
The first premise you should accept when going out to spend a few days in the wilderness is that the weather is always unpredictable, even when it isn’t. Pack some spare clothes that you can change into if you happen to be caught in a flash shower because the last thing you want to do is have to sleep on the ground in wet clothes, or in no clothes at all.
A good Swiss army knife is always good to have when you’re out in the woods. You can use it to kill and skin an animal, cut up paracord to make a clothesline, and even prep a campfire. A good one will run you for about $60, but rest assured that it will last you a lifetime if you take good care of it.

Don’t even think about spending a night in the woods just in a sleeping bag. Although it’s a romantic notion to fall asleep under the stars, in reality, it is almost never warm enough to warrant this. Get a good tent, or learn how to find or make a shelter for yourself, because you really are going to need it.
As I said, accidents happen in the wild, and the worst thing about this is that you’re too far away from civilization to get immediate assistance in case something does happen. So, until you can get back, you’re on your own and you need to find a way to treat the injury until you can get professional help. A first aid kit is an absolute necessity for this kind of situation, and it should be filled with stuff like sterile gauze, elastic bandages, band-aids, antibiotics, pain killers, and the like.
Bugs can be a real nuisance when you’re out in the woods, and some can actually cause serious irritations and allergies if you’re susceptible. Bring along some bug repellant and apply it often to make sure you aren’t bitten. Additionally, you should probably protect yourself from sunburns and UV radiation by packing some high SPF sunscreen, as there are few things more annoying than having to carry around a huge backpack when your shoulders are all burned and sore.
Does the idea of a long bike tour, turning your legs for hours, make you tingle with excitement? Me too! Sadly, if you’re not careful, an extended bike trip can become incredibly expensive. If you wanted to, you could spend an entire month's travel money on a set of handlebars.
There’s nothing wrong with this, but the budget tourer has to be frugal in their approach. I recently cycled my bike across Europe and learned a few tricks along the way.
Here’s my approach to saving cash.
Don’t use campsites. I was once cycling around Italy at 8 pm at night. I found a campsite and asked to pitch my tent. After finding out the price of camping wasn’t much less than the price of a hotel room, I said thanks, but no thanks.
With that, I cycled around the corner, made friends with some locals, and ended up camping in their garden for free.
If there are no locals around another great way to save on accommodation is to simply stealth camp. You’re able to stealth camp almost anywhere. During my travels as well as camping in people’s gardens I’ve camped on the beach and under motorway bridges.
Quieter places in nature can also be nice, and I’ve spent the majority of my nights here. It’s easy to take a quick look at your map and cycle towards the green areas. Once you arrive, all you need to do is walk 100 meters inwards, and you’re ready to go.

Once you’ve done it a few times, you’ll develop an eye for what areas are best to stop off at. Many people sleep in tents, but nowadays I’m more of a hammock kind of guy. They’re easier to keep away from wildlife, and I personally find them much comfier.
If you’d rather not camp out in the elements, then consider places that’ll let you stay for free. Couchsurfing is a platform that puts you in contact with people from all over the world that are willing to host you for a night or two. Even better is Warmshowers, which is the same concept but especially for bicycle tourers.
When you’re on tour, you’ll usually be on the bike, but it’s quite common to want to use some transportation in the less inspiring areas.
I try not to do this. Sometimes I quite like the dull areas as it gives me a bit of perspective and helps me enjoy the nicer parts even more.
Plus, some of the biggest surprises happened to me when I was cycling through duller landscapes.

If you do use transport, make sure you take local buses. Or, another great option is hitchhiking. Backpacker Travel has an excellent guide on how to do it safely. But the simple concept is to stick your thumb out and see if a truck will pick you up. You’ll meet some interesting people. It’s an adventure, and… it’s free!
If you’re not spending cash on accommodation or transport, your next big expenditure will be through food. Especially if you’re cycling many miles a day. It’s easy to want to reward a hard day cycling with a big feast, but you have to stay strong!
In Asia, it may be possible to eat out, but most of the time you’ll have to make do with your own cooking. Don’t worry too much! It can be fun getting food from the local market and experimenting with different recipes. During harvest seasons, you can eat for almost nothing. You’ll find fruit everywhere, and you’ll feel like a proper hunter-gatherer picking food from your environment.
You can also get discounted or even free food from shops that are about to throw food away. By law, shops have to get rid of it, but it’s more than suitable for you or me to eat.
Also, be sure to watch where you get your drinks from. If it’s suitable, you can ask locals to fill up a water bottle from their taps, or in places like Asia, they have water stations where you can fill up from instead of having to buy new bottles each time.
I’m a big fan of repairing everything that gets broken. With a bit of patience, everything from your bicycle to your sleeping bag can be fixed.
Fixing everything myself also helped to give me confidence on the road. It’s a great feeling to know that you’ll be OK if something goes wrong and you’re on your own.

Most people transition to nomadic or expatriate living after many years of following the conventional work path. My path was a little different. I grew up in France near Strasbourg, but always had dreams of living around the world. When I went to the U.S. in 2004, I studied the American tax system in Louisiana before moving to New York to work in corporate finance. In 2005, I finally received my U.S. green card and became a U.S. citizen in 2009. I was now a dual citizen of two of the most powerful and free-to-travel nations on earth.
I was already living a very diversified life, mixing and merging international cultures and bureaucratic rules in ways that were completely unknown to me before. All that would seem small, though, in comparison to the major lifestyle overhaul I would experience just four years later when I decided to pack my bags and transition to a life of full-time nomadism around the world.

Many people who travel and work online manage to do so in a mostly anonymous and “under the table” way. They are afraid of making their activities known and having to become tax compliant. What if they file something incorrectly? Why should I risk anything now by coming into the light? These people need to realize that avoiding their U.S. tax obligation would only get more complex and risky as time went on. As my earning capabilities increased, I would stand out more and more on the government’s radar. He also showed me that because I planned to eventually, renounce my U.S. citizenship, I would need to prepare now by getting caught up on at least the last five years of unfiled taxes.
Despite an unconventional working style, it is possible to keep your tax obligation as low as legally possible. I’ve worked with many U.S. citizens who have obtained multiple residencies and passports and started businesses in strategic locations. Each of them learned to branch out from the constraints of their home country to pursue their own version of an authentic lifestyle. They overcame the fear of the unknown to learn the rules of the new systems they were entering. Now they are each master of those systems. You can do the same.
Many people in the modern age continue to work for a U.S. company while going wherever their heart desires. After all, why not? Almost everything done in an office environment can be done online, from conferencing face-to-face to sending and signing documents. If you ever want to do this in a company that doesn’t already practice this arrangement, consider actively demonstrating to your employer that working remotely won’t be any functionally different to the operation of the company (or that your productivity could actually increase from home).
Personally, I have found that convincing an employer in most conventional workplaces to let you work on your own schedule from halfway around the world is too much of a cultural shock for them to handle. It is generally more favorable to create a living for yourself on your own terms. This also has an amplifying effect on the personal freedom most people are pursuing by going abroad in the first place. Alternatively, if you take your skills abroad to a foreign marketplace, you may suddenly find yourself in high demand in the job market.
Working for a larger foreign company is the easiest tax situation for Americans living abroad, and the most likely to cause you to avoid being liable to pay both income tax and Social Security. Being fully liable to both in a country with a higher tax rate and with a Social Security Totalization Agreement is another way to go about it. You may be surprised to find that some of the commonplace skills and experiences you have developed in your ordinary career at home are highly valued in certain other places. You could find yourself in a much higher-salaried position with the same qualifications simply by going where you are in greater demand.
If your goal is to start a new company and register it abroad, you can save on Social Security. You could simply create a foreign corporation with other Americans or by yourself. However, having more than 50% of the corporation owned by U.S. shareholders will make it a Controlled Foreign Corporation (which is best avoided). As your business becomes more location independent, you will likely also have a greater pool of talent available for hiring. Your money could go further – but you might have to spend more of it to overcome the shortcomings of the local infrastructure.
The new variables to deal with are nearly endless but can be mastered with time. Just be aware that the way you are used to getting things done in the United States may not be appropriate in other places. No matter what specific path you choose, it can all be managed on a practical level and in regards to your tax obligation back home. Take advantage of every tool available to you. You’re not the first one to walk this path.
If you’re an American working overseas you’ll want to pick up a copy of Olivier’s book:

U.S. Taxes for Worldly Americans – The Traveling Expat’s Guide to Living, Working, and Staying Tax Compliant Abroad
This is a sponsored article by Note Follower

Do you ever wonder what journey your cash has been on before it came to you? In the U.S. alone there are more banknotes than ever in circulation. As of December 31st, 2015 there are approximately 38.1 billion banknotes in circulation*. Yet, we have no idea about the travels these notes have been on. We thought banknotes must have a really interesting life and must travel far and from country to country, so we created Note Follower.
Note Follower is kind of like a search engine crossed with a social network for banknotes. The site allows a profile to be created for each banknote, a profile can only be created once for a given note and will show the name of the first person to add the note! If you come across a note which already has a profile created by someone else, you can post on it and add your part of the note’s story.

You can also follow a note to see any notifications about others who have posted to the note’s profile page. If you use cash frequently, especially different currencies in other countries, Note Follower can be used to help you see the combined value of the cash you’ve been in contact with.

We wanted Note Follower to be available to as many people as possible. So, we built in support for the top twenty currencies traded worldwide from the U.S. Dollar to the South African rand. Anyone’s account can add notes from all available currencies. We also wanted to keep Note Follower as open as possible, so no account is required to search for notes you come across.

If you are interested in the idea and would like to give the site a go, you can find Note Follower at www.notefollower.com.
*Source: Board of Governors of the Federal Reserve System. Currency in Circulation: Volume
www.federalreserve.gov
As your most-awaited solo trip draws near, your excitement for the actual trip is building up, and you’re just as thrilled to do your pre-travel tasks. This mainly involves listing down things you need for your trip, and of course, shopping for your travel essentials!
Before you go on a pre-travel shopping spree, keep in mind the main goal of every solo backpacker: travel light. Aside from your clothes, you must also consider several other things such as photography gear and your bag.
To help you prepare for your first solo trip, here are some recommended travel gear to bring so that you’ll be able to travel light:
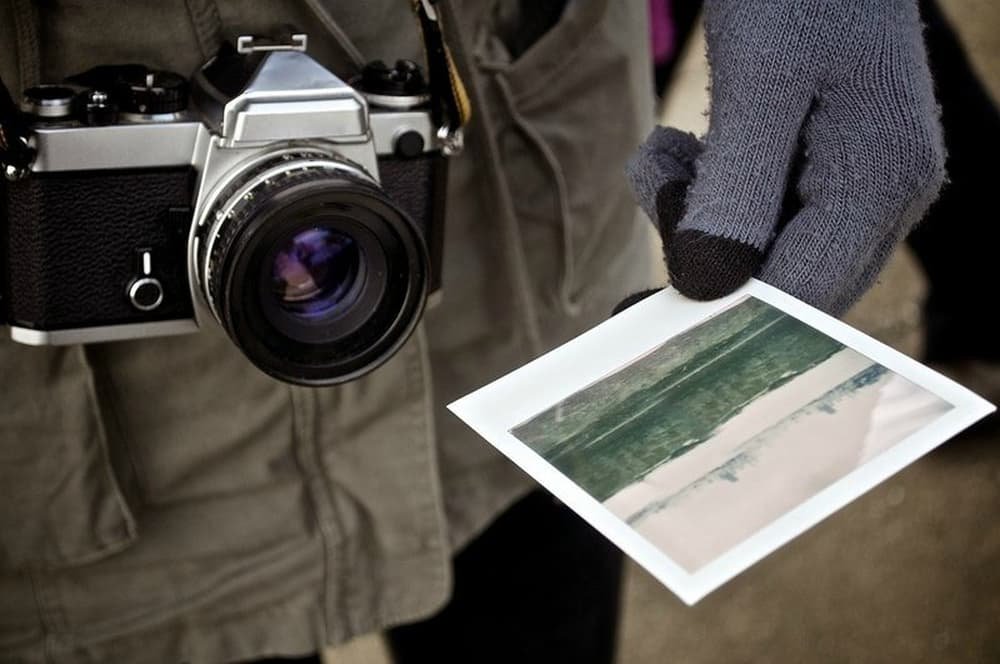
Of course, you’re going to take a lot of travel photos! For solo travelers, a compact camera is ideal because it’s light and easy to carry. Whether it’s a mirrorless camera, a rugged point and shoot, or an action camera, get one that produces high-quality photos and has long battery life.
When you get back home, gather your best photos and create a travel photo book out of them. Your personalized photo book will surely be a perfect keepsake of an important milestone in your life: your first ever solo trip!
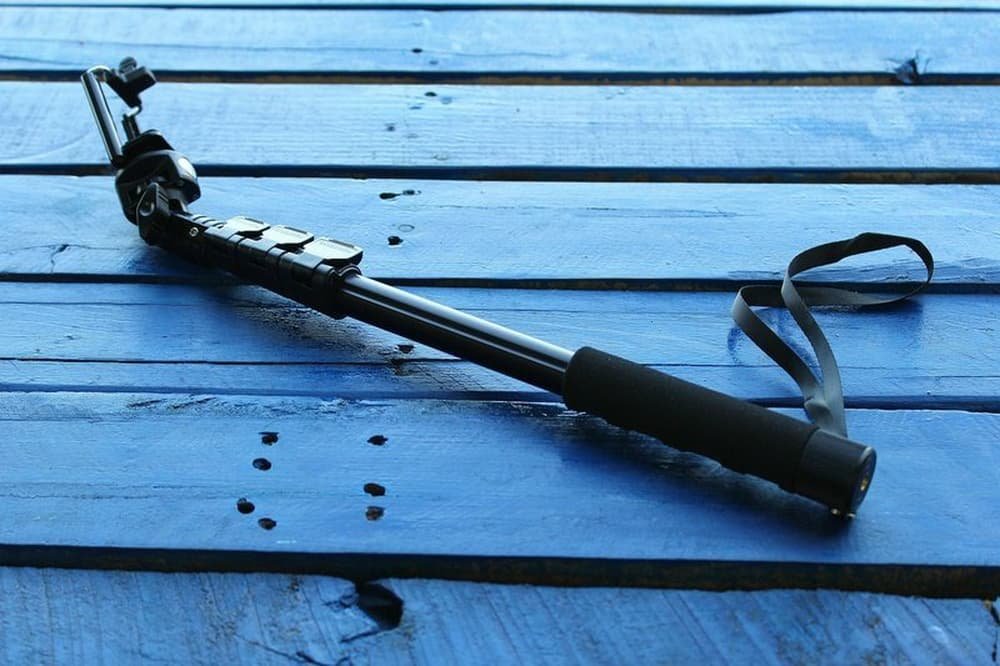
Having no companion to take your solo photos won’t be a problem as long as you have a selfie stick with you. Taking perfect selfies with a lightweight yet sturdy selfie stick can steady your camera to avoid blurry shots. Aside from convenience, it can also keep your camera safe from thieves. You won’t have to ask strangers to take your photo and fear that they’ll run away with your precious (and maybe expensive) gadget.

A durable, lightweight, and functional backpack is every solo traveler’s best friend. When choosing a backpack, consider its size (make sure it’s neither too small nor too big for your body), compartments, weight, water resistance, and storage capability. The wrong kind of backpack will just add weight to your back, make you get tired easily, and lead to sore back and shoulders.
Also, make sure you don’t overpack even if there’s still room in the bag. As long as the travel essentials can fit in one bag, you’re good to go.
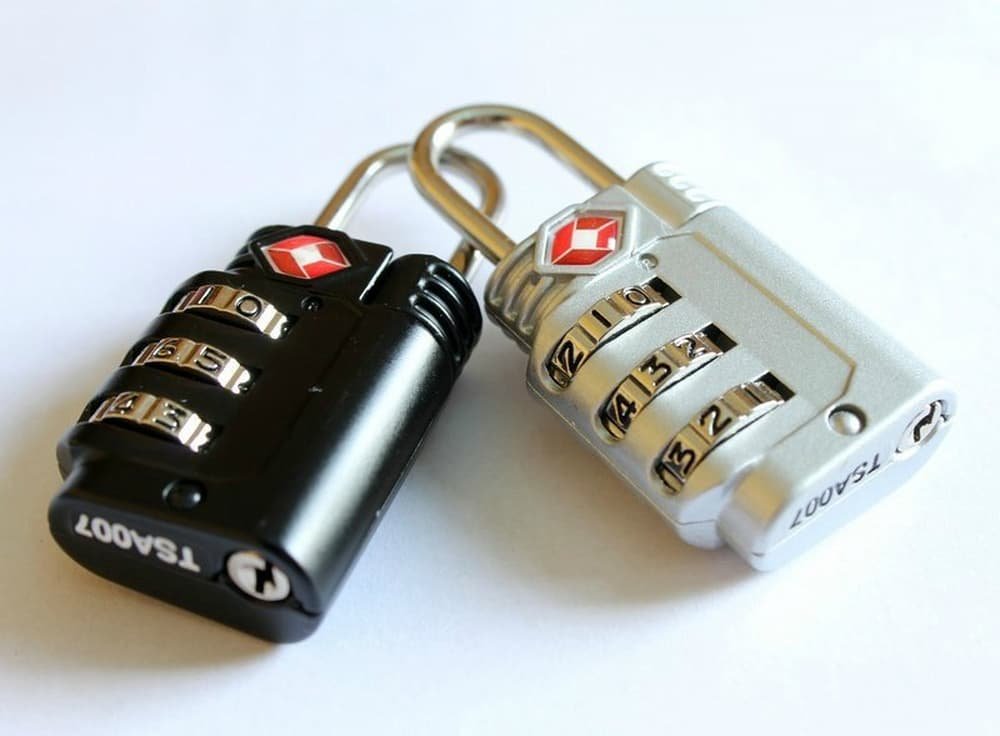
Even though a lot of hostels provide guests with a lock for their lockers, it’s still good to bring at least two backups. Buy an encrypted padlock that’s durable enough to handle pressure. You can use it to lock the zippers of your backpack and keep it safe and secure.

Sockets in other countries may not be compatible with the plug of your charger or electronic device. It’s best to bring a universal adapter, so you won’t have to go through the hassle of borrowing one from the hostel or finding a store that sells one. Besides, some hostels don’t have any extras of these. It’s better to be prepared rather than to waste time looking for alternatives
With these simple and helpful items, you’ll surely enjoy your first-ever solo trip! Who knows, you might go for another one again next time. For more detailed packing tips see this guide – Packing for Every Trip Type.
Happy travels!
Around the world, people are getting together with family and friends to celebrate the holiday season. While you are probably familiar with Christmas traditions such as Santa Claus giving presents, kissing under the mistletoe, and singing Christmas carols, some countries also have some quirky cultural customs. Here are 10 interesting traditions we found.

The Christmas pudding or plum pudding is a necessity for Brits at Christmas. Families often claim to have their own secret recipes that have been passed down for generations. It is a tradition for each member of the family to stir the pudding and make a wish. Brandy is poured over the pudding and set alight when served.
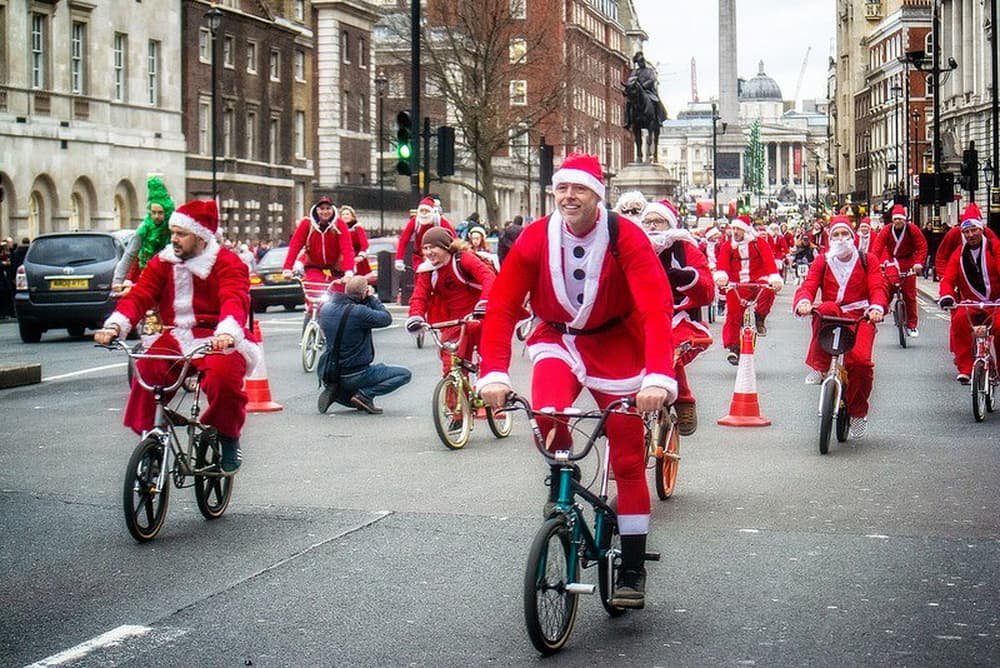
Santacon is an annual gathering/pub crawl where people dress up as Santa (it has now expanded to other Christmas characters). Started as a theatrical prank in San Francisco back in 1994, it has now grown into a worldwide event with over 350 cities in 50 countries in 2015.

It’s incredible how powerful advertising can be. Back in 1974, Kentucky Fried Chicken (now KFC), ran an extremely popular campaign associating its fried chicken with the Christmas tradition, replacing the unpopular turkey. See, marketing works!

Goats play a big role in Swedish Christmas celebrations from small ornaments to gigantic structures, such as the goats in the city of Gävle that are set up every year in December. Strangely, the big Gävle goat is traditionally vandalized or burnt down each year. Since 1966, the goat has survived until Christmas Day only 13 times.


The Tió de Nadal (meaning “Christmas log”) is a hollow tree trunk with little legs and a face painted on it. Each night, the children give the tió, or log, a little bit to “eat” and cover it with a little blanket so that it won’t be cold at night. On Christmas day, they put the tió into the fireplace and order it to poop, encouraging it by beating it with sticks while singing traditional songs. The Catalans also display a Caganer – a figurine shown to be pooping, appearing in nativity scenes and wearing the traditional Catalan red cap with its trousers down. Statuettes of well-known people pooping are a strong Christmas tradition in Catalonia, dating back to the 18th century – and symbolize fertilization, hope and prosperity for the coming year.

In the Czech Republic, single people who want to find a spouse before the next Christmas celebration stand with their backs to the door and throw a shoe over their shoulders on Christmas day. If the shoe lands with the toe pointing to the door, congratulations – you’re going to get married soon!

The Night of the Radishes (or Noche de Rábanos) is an annual event in the city of Oaxaca, Mexico dedicated to the carving of oversized radishes to create scenes that compete for prizes in various categories. The event has its origins in the colonial period when radishes were introduced by the Spanish. Oaxaca has a long wood carving tradition and farmers began carving radishes into figures as a way to attract customers’ attention at the market in the main square a couple of days before Christmas. In 1897, the city created a formal competition.

In Ukraine, Christmas trees are often decorated with (fake) spider webs to usher in good luck during the coming year. The legend goes that a poverty-stricken family went to bed on Christmas Eve upset because they wouldn’t be able to decorate their tree. The spiders, roaming the home’s walls and floors, heard the cries of the family and took it upon themselves to decorate the tree with their webs. On Christmas Day, the strands turned to gold and silver, changing the family’s fortune forever.

Many years ago in Norway, people believed witches and evil spirits came out on Christmas Eve to play. Needing transport, they would look for brooms to ride on. Not wanting their brooms to be stolen, the local people made sure that the brooms were well hidden. Today Norwegians still hide all brooms in their house before going to bed on Christmas Eve.

In Austro-Bavarian Alpine folklore, Krampus is a horned, anthropomorphic figure who, during the Christmas season, punishes children who have misbehaved, in contrast with Saint Nicholas, who rewards the well-behaved with gifts. While it’s unclear how the myth of Krampus started, Krampus is one of a number of companions of Saint Nicholas in a number of European regions – it is featured on holiday greeting cards called Krampuskarten and in traditional parades – such as the traditional procession in Hallein, Salzburg, you can find young men dressed as this scary creature.
One of the trickiest parts of becoming a travel photographer/blogger is supporting your journeys. It’s not as simple as taking great photos and watching the money roll in. In fact, many seasoned travel photographers find it difficult to make a steady living. Taking beautiful photos just isn’t enough.
Taking beautiful photos just isn’t enough. The most successful travel photographers work just as hard on marketing themselves as they do on learning to take better photos, in most cases more so.
Sponsorships are great for a short burst of revenue, but how do you build a passive income to keep you going? By thinking about how you can take a hobby like photography and turn it into a passive income stream, you may be able to fund your travel for a longer time than expected.
Below you’ll find three ways to help use photography to earn passive income and keep yourself moving.
The first thing you need is a solution to properly show off and be able to sell prints. You can either sell the original high res photo to a collector or one-off prints to consumers. Backpacker Travel has partnered with SmugMug as they provide a range of solutions for beginners to professionals.
SmugMug offers numerous website designs built specifically for photographers. All packages give you secure, unlimited photo storage, easy uploads anywhere you can connect online (this saves camera and card storage space) as well as a simple e-commerce solution where you set your own retail prices. Now your friends, fans, or the people who discover your shots can purchase them or print them on more than 1,200 products.
By having these tested websites ready to sell your work, you have a custom print shop opened 24 hours to help fund your trip. Click on the following discount link and save 15% off any SmugMug package to get your portfolio started today.

One of the hardest parts of being a travel photographer (who gets to continue to travel) is having the funds to keep going. The more real eyeballs you have on your site, the more you can make. Just make sure they are real and engaged viewers.
Buying likes/fans or counting robot and traffic exchange traffic doesn’t count. Your sponsors will catch on when they don’t get visitors or sales and you’ll find yourself with a bad reputation and a lack of funds. This is where your photography helps.
As you take amazing shots, make sure you watermark them so that people can find you and your website. You may first want to upload them to social media and sharing sites like Instagram, Google+, Pinterest, and Flickr. You can even create a slideshow with a narrative for YouTube which can drive a ton of new visitors.
Next, add your URL to the social media image descriptions so that people can go to your website and also source the image back to you if they decide to use it.

Having your photos out there and an easy way to contact you (your store or site) is a great way to attract attention and gain sponsorships and perks. If you’ve built a following and are traveling to a specific city, you can use your traffic volume to pitch a hotel or bed and breakfast for a free night.
To make a pitch stand out more, send sample hotel/food posts that have a lot of shares and activity on them. The samples show the sponsor the quality of your work and the activity shows that you can generate real engagement. You may also want to offer them the rights to a shot of their choosing in exchange for the perk. Next, you’ll need to look at your website and social media analytics.
If you have a decent amount of fans in a specific region, try writing to some restaurants in that area and agree to do reviews in exchange for a nice meal. The same goes for entertainment and tours.
National parks, airlines, and even some cities offer press junket trips so that you get to experience everything while also going behind the scenes. If you have the audience, it doesn’t hurt to write to them and see if you can gain sponsorship money as well as complimentary rooms, board, and entertainment. The sponsor will be happy if you drive the traffic to them and you’ll earn money, or at least get a free perk.
Once you have an audience on your website you can begin monetizing the traffic. Try a mix of monetization techniques including:
Plus a lot more…
By finding the right mix of monetization strategies, a way to sell your work, and building a loyal following, you can use your photography to help fund your travels. It all starts with having a website and a blog to sell and share your work. From there, if you have the talent and a bit of luck, you can build a solid stream of income to help fund your journey.
Fear. Anxiety. Seasickness. Claustrophobia. Chances are that if you’re trying scuba diving for the first time, you’ll feel one or more of these things. Whether it’s concerns about breathing underwater or being bewildered by all the scuba gear – regulator, fins, wetsuit, and even a weight harness – scuba diving can be overwhelming when you start.
And that’s totally normal. Let’s face it – unless you’re born an amphibian, breathing from a tank underwater is an unnatural experience. I’m from the northeast of England – an industrial, socially radical city where beaches, warm and clear oceans, and scuba diving are completely foreign concepts. But after snorkeling and scuba diving in places like Thailand, Trinidad & Tobago, Venezuela, Ecuador, and the Galapagos Islands, here are my top 10 tips for taking the plunge – no pun intended.
Most people don’t think about how they’re breathing each day, but when you’re underwater, you can hear your breathing and are using a respirator to do so, which can be a bit weird initially. Just take things slowly and breathe in and out at a calm pace. You can also use a full face dive mask as this will allow you to breathe from your nose and mouth at the same time.
Rather than diving into the water from the back of a boat, see if you can get into the water by walking in from the shore, or practicing in a swimming pool. It helps to become acquainted with the scuba diving experience this way and most likely will be how you start if you’re doing an Open Water diver course.

Any reputable scuba diving school will make sure that everyone has a buddy before they go diving. It’s a really important safety procedure so that groups can dive and cooperate with each other. Find someone with more experience than you to be your buddy as well as the scuba instructor; diving with a group can help you feel more comfortable and also give you the opportunity to make friends with people with who you can talk about your diving experiences afterward.

There are a lot of common hand signals when diving because you obviously cannot talk underwater. Make sure that you are aware of the most important signals before diving – okay, not okay, up/end the dive, down, slow down, stop, and low on air. Don’t worry if you happen to forget some of these, as long as you remember the most important ones you will be fine.

Ear woes can be a big challenge for even the most experienced scuba divers. Equalizing your ears means opening up the lower ends of your Eustachian tubes to allow air to enter the cavity of your ears, countering the pressure from the outside as you dive deeper. There are a number of techniques to equalize – whether it’s pinching your nose and swallowing, or pinching your nose and blowing air up through your throat. It may be tricky at first, but find the most effective technique for you.

There are hundreds upon hundreds of scuba diving schools worldwide and they all offer a different experience. Ahead of your dive, make a point to visit the diving center and meet your instructor. Don’t be afraid to chat with him or her and explain your concerns. Most instructors are very helpful and it’s totally rare for them to literally want to throw you in the deep end and just deal with what’s going on around you. Scuba instructors have most likely seen your worries a thousand times. If you’re still feeling nervous, asking to prepare ahead of time in calmer waters or even a private lesson may be another option.

Scuba diving can be a surprisingly tiring activity. While many experienced divers look like they are swimming along effortlessly beneath the ocean surface, it can be quite exhausting – the oxygen tanks are rather heavy on land, there’s a lot of gear to contend with, and initially equalizing may take some time to get used to. Like any physical activity, making sure you have enough rest and energy beforehand makes a big difference.

Worried about life underwater wanting to gobble you up? Well have no fear; even sharks aren’t really bothered about scuba divers. You are a decent size, have protective equipment on, as well as a big metal air tank and bubbles coming out of your regulator. For your first dive, you’ll most likely be in an area well-frequented by other divers and not very far from the surface, so the chances are slim of something coming and challenging you in the water.

Remember that this is something you want. You want to be free under the water, see the beautifully colored fish, swim over mountains of coral, move like you are flying, discover space again during night dives, or get pumped at swimming with sharks! Remember this is what you can do. Everything takes time, but once you get this, it’ll be an exhilarating, addicting experience. Motivate yourself by maybe looking at pictures or watching some scuba documentaries before your dive. It will bring a sense of calmness to you, and excitement and will remind you why this is such an awesome thing to do.
Diving Cozumel [Video] by Mike Gerrie
Many believe that we do not belong so deep in the water. We are humans and we belong on the surface, so of course, it may feel foreign to you. However, treat this as an opportunity, to explore and do something different. Think of yourself as an underwater adventurer, like in the movies. Scuba is a great experience and can be an awesome hobby and cool job. Most of the people in the world will not Scuba dive in their lifetime, let alone get over their fears to try it. This is your time and your experience. Live it.

If you still feel nervous, know that there are many accredited schools where you can take a range of PADI scuba diving programs to become more comfortable with the ins and outs of scuba diving. Whether it’s diving with marine life, exploring shipwrecks, or enjoying the open water, scuba diving around the world is an amazing experience.
I had known about Esperanto, the world’s most widely spoken artificial language since I was a teenager. Connected to the noble ideas of internationalism and equality, it attracted me even then.
Esperanto was created in the second half of the 19th century by a Polish ophthalmologist, Ludwik Zamenhof. Growing up during the time of the Russian empire in what today would be eastern Poland, Zamenhof was surrounded by several different ethnic groups all having their own mother tongue: Yiddish, Polish, German and Ukrainian, for instance. To communicate with each other they all spoke in Russian. The idea behind creating Esperanto was that it should be an easy-to-learn language for international communication, putting everyone on an egalitarian level. Nobody would be forced to learn the mother tongue of another.
When I started looking into Esperanto last year, it was out of sheer curiosity, not with the intention to actually learn it. But as I read about it, I soon noticed I was already picking it up. I realized it would take me a minimum effort to acquire, so I went for it. I started with this website. It is the biggest Esperanto online forum, with interactive lessons and access to a huge community of speakers.

Esperanto grammar is as simple as possible, while still allowing one to express complex concepts like any natural language does. It is 100% logical, which means that there are straightforward rules and no exceptions. Anyone who has ever tried to learn a natural language will know how frustratingly difficult it can be to memorize all the exceptions which usually occur.
While Esperanto grammar can be said to be a simplified version of the grammar of Romance languages, the vocabulary has several origins: Romance languages, German, English, Russian, and Greek. This facilitates learning for speakers of any one of these languages. The bulk of Esperanto verbs come from Romance roots, for example, the verbs labori (to work), legi (to read) or dormi (to sleep). Many people around the world either speak a Romance language or had a bit of French or Spanish at school. Even if they never began to really speak these languages and forgot most of the lessons they had, many words will come back up from the depths of their minds if they try to learn Esperanto. English speakers will also recognize these words from somewhere since English has absorbed a lot of French and Latin loanwords over the past millennium. Isn’t labori close to “labour”, legi close to “legible” and dormi to “dormant”?
Since I am a speaker of German, English, Russian, French, and Spanish, and have also done five years of Latin in high school, I will admit I was predisposed to absorbing most of Esperanto’s vocabulary very quickly. The only words I really had to learn from scratch were those of Greek origin. I can honestly say it felt like I learned how to use Esperanto in only two weeks. For a language lover like me, it was like being given a free toy.
While I may have personally picked it up with exceptional ease, it is generally accepted that anyone can learn Esperanto in three to six months. Especially for individuals who would like to become polyglots, that is, for people who want to learn not just one specific foreign language but several ones, it can be a good idea to master Esperanto early on. Because, as all language lovers know, language learning gets easier with each language you already have under your belt.
One of the things that struck me when I first listened to Esperanto was how pretty I thought it sounded. That definitely surprised me for an artificial language.
As the temperatures in the Northern hemisphere drop, we trade surf for snow, and what better place to be for winter than Europe. Not just for the rich and famous, snow sports open their chilly legs wide for all to enjoy.
We are talking snowy alpine peaks, warm apre bars, daggy one-piece suits, ski goggles, and the ridiculous tan lines that come with them. Within this pristine pass-time, however, there is some serious rivalry; skiers vs. snowboarders.
So we’ve put together a comparison of the smartly-suited, elegant skier and the baggy-clothed, chilled-out, snowboarder.

Slimmer pants, a fitted ski jacket, eisbar beanie, and matching scarf and gloves, matching goggles. More plain and simple colors.

Knees and legs

Ice and bumpy terrain, flatter areas. Easier to learn but harder to master.

Nordics created skis to get around, go hunting, and for military ops.

Alpine, Freestyle, Park, Nordic, Military, and others
GNAR – Gaffney’s Numerical Assessment of Radness (see the movie of the same name)
Snow-bunny – an inexperienced female skier who’s more into sitting at the cafe with a coffee looking cute than actually getting better.
Snow scum – boarders who don’t give a damn about the rules aka snowboarders
Bros and Big air – friends and a good deal of time in the air during a jump
Dicks on Sticks – Usually heard coming from a snowboarder's mouth
Ski-Bum – Seasonal workers who work more on a hangover than they do for money.
Apre Ski – Means “After Ski”; copious drinking after riding

Baggy pants, loud clothing, beanie with bright colors, and pom-poms in all the right places. Backpack for beers.

Wrists, collar bones, and knees

Picking up the opposite sex. Powder and tree runs, jumping off shit. Harder to learn.

Invented by Sherman Poppen as a toy for his daughter, or maybe a surfer just got lost

Park riding, Jibbing, Freeriding, Freestyle and Freecarve
Pow – Deep snow, the reason to get out of bed in the morning
“Dude, that was epic pow!”
Shreddin’/Ridin’/Cruisin’ – to ride
Basically the snow equivalent of surfer lingo
Stomp/Bail – succeed or fail at a landing
“She just stomped that landing.”
Jibbing – sliding over objects that aren’t snow (eg. trees, rails, a skier)
Taco – to fall over a fence/rail so your body folds in half.
Scorpion – Falling forward so your legs come behind and hit you on the back of the head
Ski-Bum – See Skier's terms
Wanks on Planks – A response from Skiers when referred to as Dicks on Sticks.
So there you have it, it’s now up to you to decide which team you are on; a boarder dude or dudette or a skier bro or bro-ette… and then get to the snow.
One thing we know for sure that both sides have in common is the love of Apre Ski, a daily ritual in which they both unclip, loosen up and pickle themselves in a wondrous mix of Jagermeister, beer, schnapps, mulled wine, and pretty much anything they can get their hands on.
No matter the side, you will be up on the bar dancing arm in arm with your forgotten rival singing songs you don’t understand.
If you are looking for a snow holiday with more bang for your buck, try Andorra on for size. This tiny tax-free principality sandwiched between France and Spain offers great snow and smaller crowds.
For weekend trips leaving from Barcelona, check out Stoke Travel. Be sure to stock up on tax-free booze while you’re there, especially the 90% unnamed alcohol that will get you on your way in one swig.

A wicked weekend skiing and boarding with Stoke Travel in Andorra only two hours from Barcelona. For a free beanie book with the code BACKPACKER (valued at €15)
