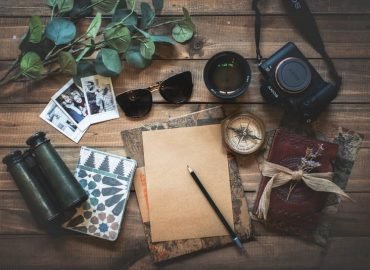
As you backpack around the world, you’ll quickly discover every place has a different feel. With its own distinctive characters, fascinating viewpoints, and interesting architecture. And while you may not be able to remember everything about a particular place, you can use a camera to document your adventures.
This is what good travel photography is all about, capturing the essence of a moment. With the overall aim to trigger the same emotions and sensations you felt at the time you took the photo. Whilst also preserving the experience forever (and racking up some serious likes on Instagram at the same time).

In this article, we detail everything you need to know about the basics of travel photography as it applies to backpackers. So, by the time you’ve finished reading it, you’ll be able to channel your inner Chris Burkard at will while exploring new countries on a shoestring.
Before we cover things such as camera settings and subject matter, we need to talk about packing your camera.
Most cameras are bulky, not to mention many of the newer models can also be pricey. Add a few lenses, filters and maybe a flash and it all adds up. You’ll be traveling with a lot of expensive gear and you’ll only have limited space. Follow our tips below though and you can rest assured your camera will make it in one piece.

If you want to ensure you don’t forget anything important, make a checklist. Then when you start packing you can simply cross off the items you’ve packed as you go. This way you minimize the risk of rocking up to a remote destination, only to realize you’ve forgotten a key piece of equipment.
When it comes to packing your camera, make sure you completely disassemble it. This means removing the camera lens from the body and packing each item separately. Just remember to keep the lens cap on though. Taking out the memory card isn’t necessary.
Cameras are fragile, which means they’ll need to be adequately protected during transit. A dedicated camera bag is a perfect solution for keeping it safe, but a little extra padding never hurt anyone if you’re stowing it in a backpack.
If possible, keep your camera and all associated gear in your carry-on luggage. This includes bringing memory cards and cables with you. In addition, some airlines are strict about bag size limits, so be sure to check how much your airline allows for carry-on.
At first glance cameras may seem like incredibly complicated devices, what with all the different dials, symbols, and buttons. Truth be told though; you can take the perfect travel shot simply by mastering the three main pillars of photography that determine how an image comes out – Shutter speed, Aperture, and ISO.

Shutter speed refers to how long it takes for your camera to snap a photo, or in other words, how long your camera shutter stays open and is exposed to light. When you use a long shutter speed, your sensor stays open for a long period of time. This will produce a blurring effect and create a sense of speed and motion.
Dim environments and the night’s sky can also be photographed this way to better illuminate the scene. For example; if you’ve ever seen a photo of Chile’s Atacama Desert at night, chances are it was taken with a long shutter speed. A fast shutter speed freezes movement and motion, making it great for capturing birds in flight, vehicles driving past, or a surfer gliding gracefully across a wave.
An aperture is a hole within the lens that allows light to enter the camera. This function works the same way as your eyes, with your iris either expanding or shrinking depending on how dark or bright it is. Aperture directly affects the exposure or brilliance of your image, with a smaller aperture letting in less light and a larger one allowing for more light. If you’re at a tropical beach in the middle of the day, opt for a small aperture. Conversely, if you have minimal light, try a larger setting.
Aperture also affects depth of field, which relates to how much of your photograph is in focus from the foreground to the background. A large aperture is great for portraits and close-ups since it narrows in on the immediate surroundings and blurs out anything else. While a smaller aperture ensures both the foreground and background are sharp, making it ideal for landscape photos when you want to create a sense of scale.
Remember, you can always use a background remover when editing in post.
In basic terms, ISO is a camera function that can brighten or darken photos. As you increase your ISO, your photos will become brighter. This makes ISO useful in taking quality shots in dark environments. The downside to raising your ISO to compensate for lack of light is that it also raises the amount of grain, or noise, in an image. We, therefore, suggest only turning ISO up if you can’t brighten the image using shutter speed or aperture.
Now that you’ve got the primary functions down, it’s time to move on to the different types of things you can shoot. This really comes down to personal opinion and everyone will have a favorite subject matter. For travel photography though, the most popular images are those of the local people, landscapes, various street or cityscapes, and places of interest.
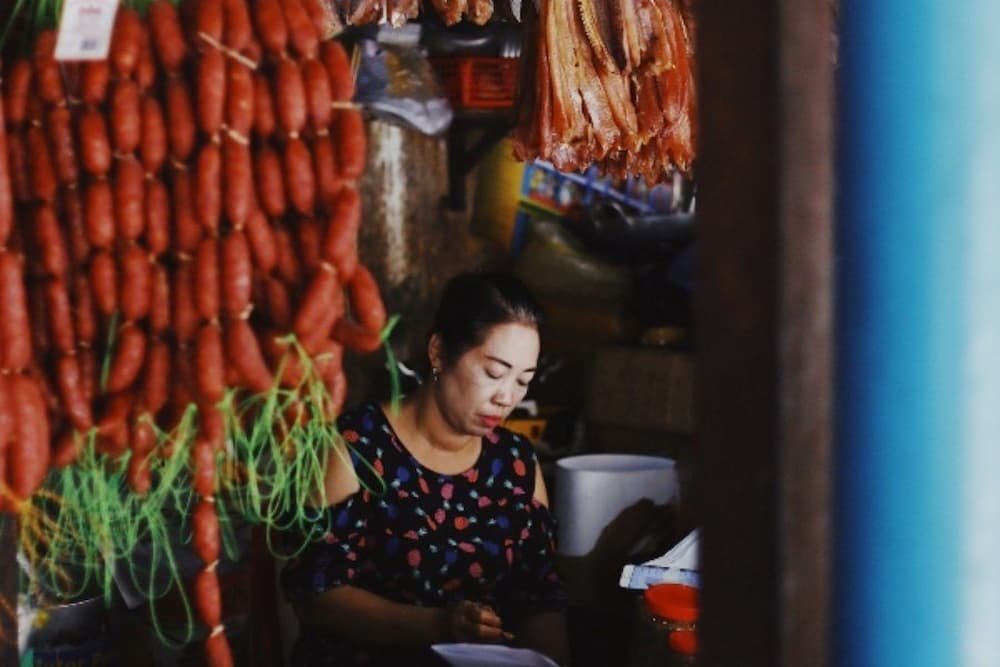
A smiling family or a boisterous market vendor can make for epic travel photos. Really any scene that depicts a local going about their daily life will look great. The trick here is to be unobtrusive and respectful of others. Not everyone likes having their photo taken after all.
Photos of glorious sunsets and sparkling waves never get old, but taking a great photo of a landscape requires a fair amount of skill. Start by identifying the essential qualities of the landscape in question. Then put yourself into position to capture them while using different settings to portray the ambiance of the subject e.g. slower shutter speed for the blurring of waves on a beach at dusk, high shutter speed for waves crashing into rocks on a stormy day.
Cities and towns are a great place to hone your skills as a travel photographer, as they offer both varied scenes and a wide spectrum of lighting. Like landscapes, a great image of a city or town captures the sense of the place and some of its more distinctive features. Cities and towns also provide ample opportunity to take photos at night, given that street and building lights can deliver some truly epic shots.
Every place has its own monuments or places of interest. When taking a photo of these, you should consider what they actually represent. The famous Bondi Beach in Australia, for example, is one of the few places that are photogenic even during the middle of the day when it’s busy and the sun is out.
A picture of a historic site, on the other hand, might call for lighting and angles that are a little more dramatic. Just remember that if you want to avoid the crowds that flood many places of interest, compose carefully, opt for early morning or late evening and get creative with your vantage point.
Once you've captured stunning travel photos, consider turning them into beautifully crafted photo books to relive your adventures for years to come.
If you’re already booked up on your next trip and want to accelerate the learning process, we’ve got some pro tips that are sure to help. Check them out now and apply them when you’re scouting for that perfect shot. Who knows? They may just help you snap the best photo you’ve ever taken.

Of course, becoming a decent travel photographer takes dedication. The problem is that like most hobbies, photography will play second fiddle until you start blocking out time to do it. Put it in your diary or make a photo schedule if you have to. Whatever it takes to ensure you won’t be distracted and can instead focus on nailing a killer image.
Many of the best professional photographers, particularly those who specialize in landscapes, talk about taking photos during the ‘golden hours’. For those of you who aren’t quite sure when this is, the ‘golden hours’ are the moments roughly one hour after sunrise and one hour before sunset. During this period, the light is softer, there’s a warm tinge to everything and the low sun can cast shadows on various buildings and terrains, highlighting their features.
Chris Burkard, Chelsea Kauai, Daniel Kordan, and pretty much every photographer featured on National Geographic Travel are all great people to follow on Instagram. Mainly for the reason that you can see first-hand what a good photo looks like, but also for a bit of welcome inspiration. Travel photographers also venture to some pretty far-out places, so they’ll probably widen your horizons when it comes to future backpacking destinations.
It’s often said that the one time you have the perfect chance for an incredible image will be the one time you don’t bring your camera. It almost goes without saying then that serendipity plays a big role in travel photography. Sometimes you’ll be in the right place at the wrong time, while other times you’ll get lucky. As long as you’ve got your camera handy (and a backup memory card) you’ll almost always come away with the shot.
The best photographers are contortionists. They're the ones that are lying on the ground, kneeling in the dirt, and twisting their bodies in order to find a different perspective. Don’t be afraid to get dirty or try shooting from a different angle. As with all things, the effort you put into something is generally equal to what you get out of it.
Hit the road armed with these travel photography basics and your camera and nail that perfect shot today!